top of page


Multi-Block Relief
The goal of this project is to use three key blocks to create a multi-colored series of prints. The sections of the block that are carved out are the negative spaces of the print. The protruding areas are the parts of the image that a brayer rolls ink onto the surface. The carved out sections of all three blocks create the white space in the prints. Each print uses registering to line up all of the blocks during the three step printing process.
Step 1

The first block uses a tan ink to create the skin tone of the girl. This is the base layer.

Step 2

The second block uses a red and green ink to create the hair, nails, lips, and eyes.

Step 3

The third block uses black ink to create all of the details in the girl's face and hands.


Acrylic Landscapes
These acrylic paintings are inspired by Bob Ross' series of landscape paintings. I am fascinated by his use of colors and blending methods to create multi-dimensional paintings, and I've used several of his techniques to create my own works of art.


Graphite, Charcoal, and White Conte on Paper
After deciding to pursue an Art Studio minor, I felt it was important to strengthen my skills in drawing by using figure, form, proportion, and value. I demonstrated these principles of art in different exercises such as a self-portrait, creating three-dimensional shapes, and the profile of a skull. Starting with basic forms helped me build my technique as an artist. By the end of my studies, I learned how to properly use perceptual, technical, and critical tools.


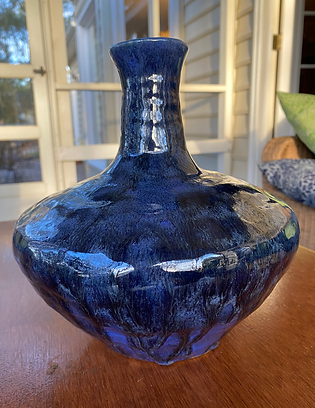
Coil and Pinch Vase
This nine-inch vase uses a mix of coil and pinch construction. I wanted to make a curvy vase with a skinny neck. Slabs of clay were rolled into coils and scored onto the base slab using slip. The longer coils created wider parts, while shorter coils created the skinnier parts. Then, I used a pinch method to create a smooth transition between the coils. In between classes, I kept the vase leather hard by using a plastic bag to cover it. After the construction was done, I glazed the vase in the bisque stage and fired it to create the final vase.


bottom of page